|
To clear a room full of enemies, you don't need a whole lot of firepower.
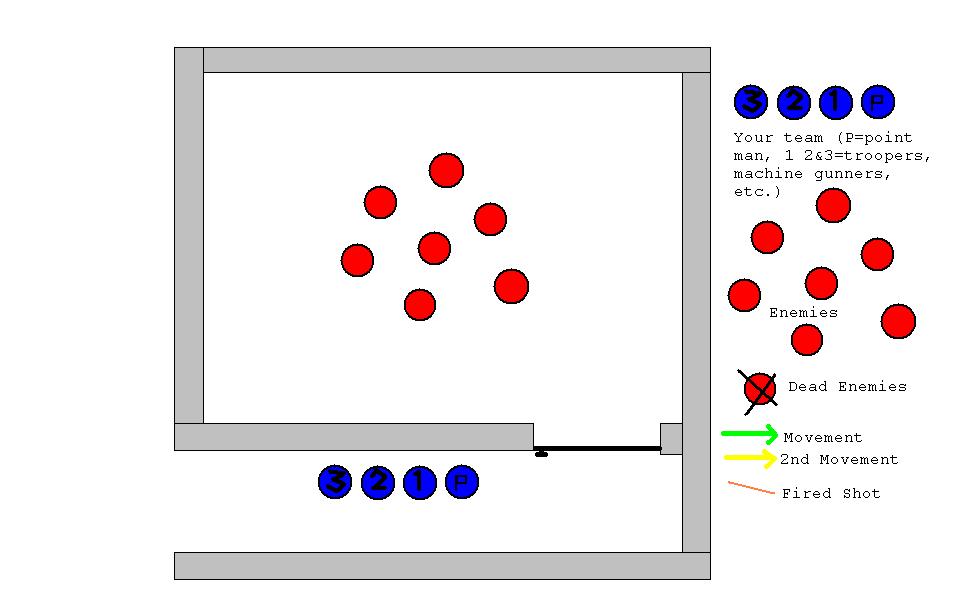
You only need four people, with at least one single-shot weapon in each hand. Some people with ratchetblasts (or similar
multi-shot, single-hand-cocking weapons) can be very nice, though, in the event that someone misses. Start your group
of four to the side of the doorway (point man in front.) For demonstration purposes, the group is depicted in the diagram
as starting in a hallway adjacent to the room, seen here:
Your team should approach the door pressed against the wall (left
side forward if moving right, right side forward if moving left) and your point man should stop when he is within comfortable
reach of the handle, as shown.
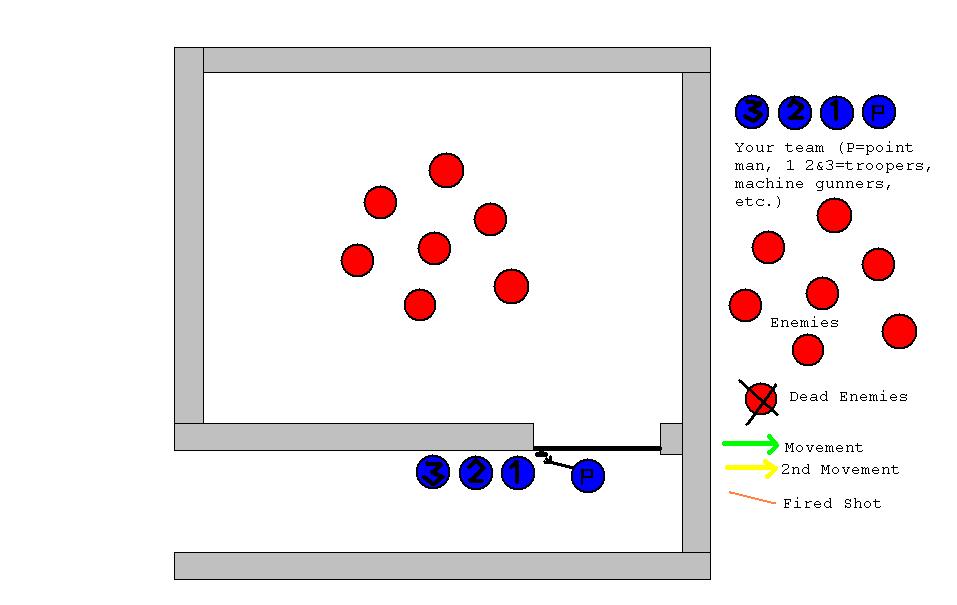
Your point man, having a firm grasp on the doorknob, should now swing
the door open VERY QUICKLY. Notice: he should remain behind the door. He is NOT the first to enter the room.
Blue #1 is.
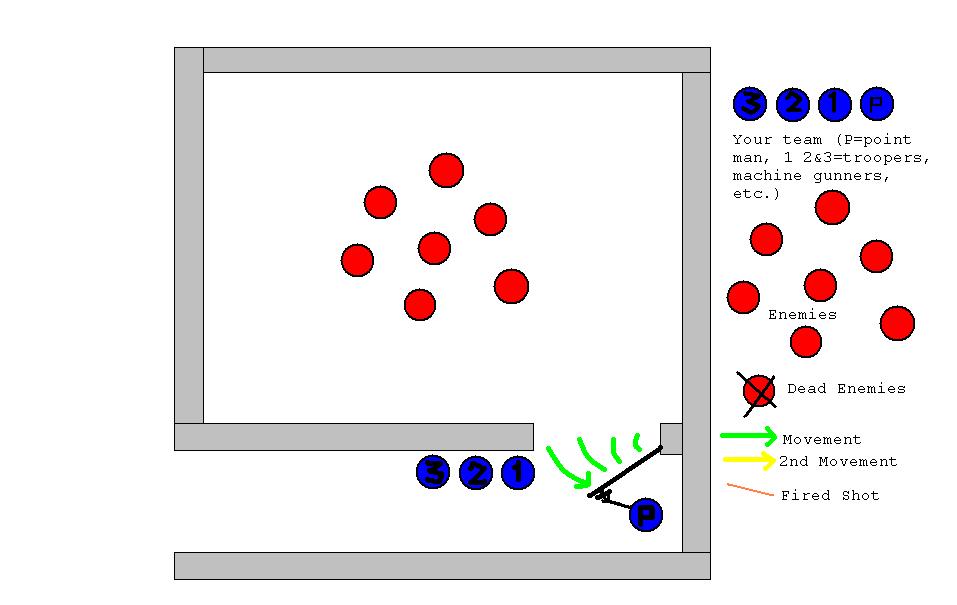
When the door is swung open by your point man, Blue #1 should immediately
enter. From now on, everything happens in a matter of about four seconds if done properly. Your enemy will NOT
have enough time to react.
When Blue #1 entered (above) he fired at his nearest enemy.
At the same time, the Point man came around the door into his entrance position. This ensures that it all flows,
with the maximum speed possible. Now, Blue #1 strafes quickly accross the wall on the right of the door, firing at his
next closest enemy, while the point man strafes quickly across the wall to the left of the door, also firing at his
closest enemy (as shown below.)
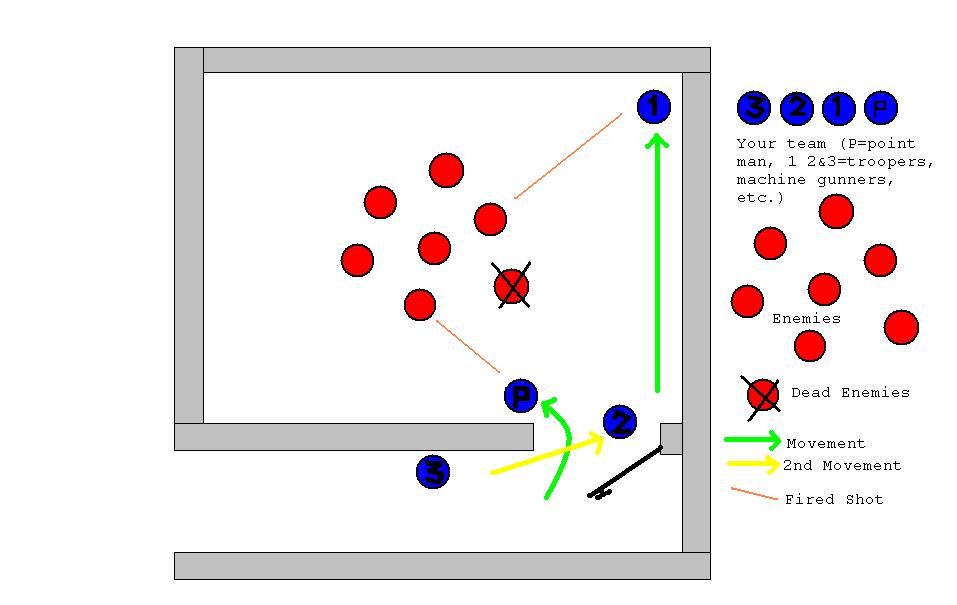
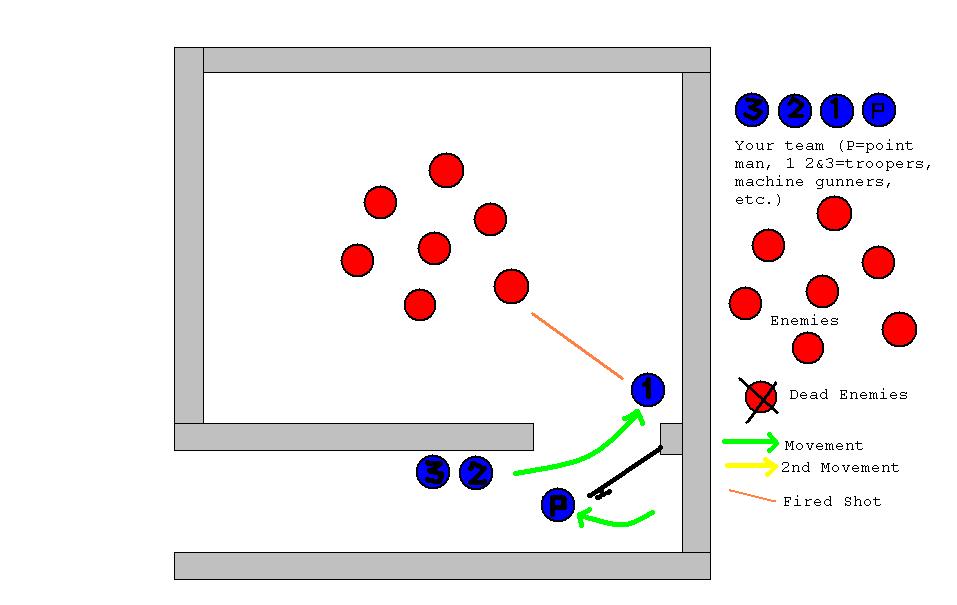
Right after the point man swings around the door and enters, Blue
#2 comes up to position for entry right behind his (above.) Now, Blue #1 strafes across the next wall, continuing around
to the corner opposite the door, firing again at his nearest enemy. The point man strafes across the wall to the corner
left of the door and fires, while Blue #2 enters, firing, and strafes across to Blue #1's initial corner, as seen below.
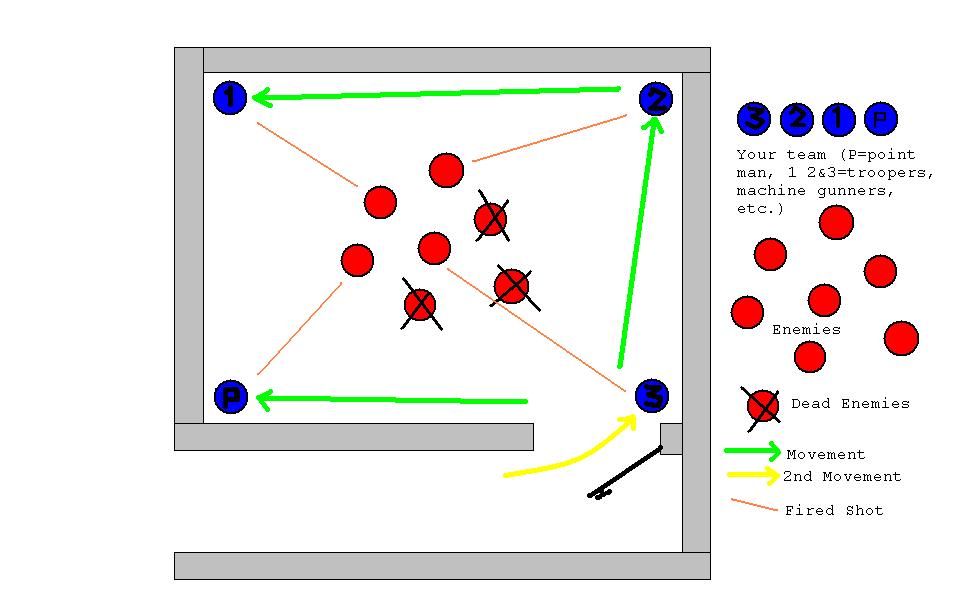
Once Blue #2 has begun to strafe across to Blue #1's initial corner,
blue #3 enters and remains at the door. You now have a teammate at each corner, and they all fire one last time at their
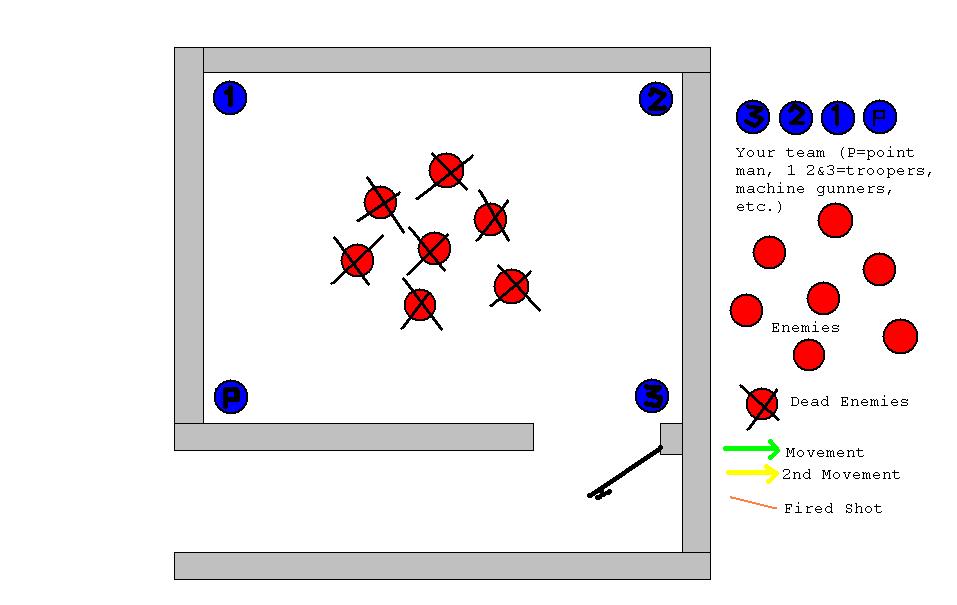
nearest enemy. This is shown above, and the final results are shown in the final diagram below. If you fire exactly
as many times as mentioned here in this walkthrough, and they all hit their target, you can take out seven enemies in the
room (the scenario depicted in the diagrams.) If you do not hit every time, you are, of course, able to fire again.
Nothing's keeping you from doing so. If you have access to them, a blastfire, Hornet AS-6, Powerclip, or Mad Hornet
could be very useful for the imminent event when one of your teammates misses. Wildfires are too much for this small
job, and you run the risk of taking out a teammate. The same goes for the Mantaray. I also suggest that you do
not use the "blast button" feature on the Blastfire or the Hornet AS-6, as it has the ability to accidentally take out a teammate
as well.
|