|
When asaulting a bunker outside, you will need at least two people,
but three are preferable. One will serve as Point man, and the other(s) should be troopers or machine gunners.
You will definetely need three total if you do not know the number of people behind the bunker. If there is more than
one person behind the bunker, and you are aware of it, two people would also be preferable. Start your group behind
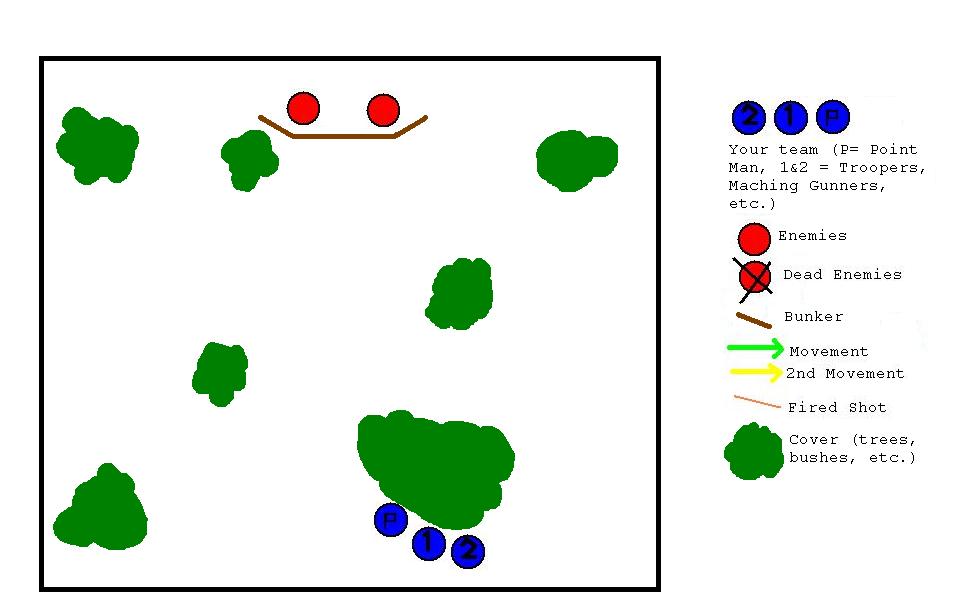
a good piece of cover a good distance away from the bunker. This will (hopefully) allow you to get to this cover
without the enemy seeing you. The whole point of this entire tactic is to make the enemy think that there is only
one person on your team there, until it is too late. So use extreme caution when moving to this first piece of cover
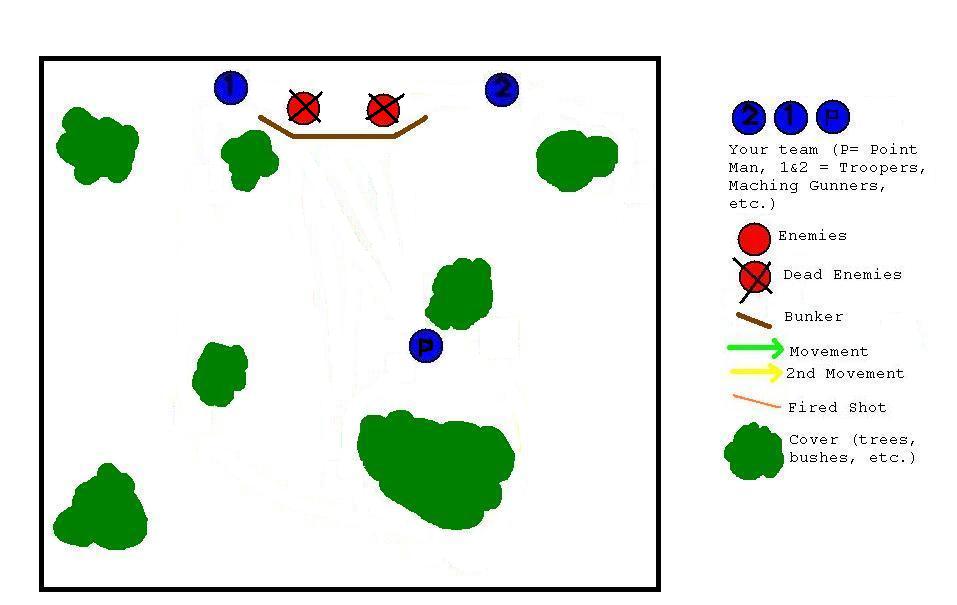
so that they do not see you. Have your team with their backs pressed against the cover, point man on one end (for demonstration
purposes, the point man is on the left in the diagram below) with the other two lined up next to him against the cover.
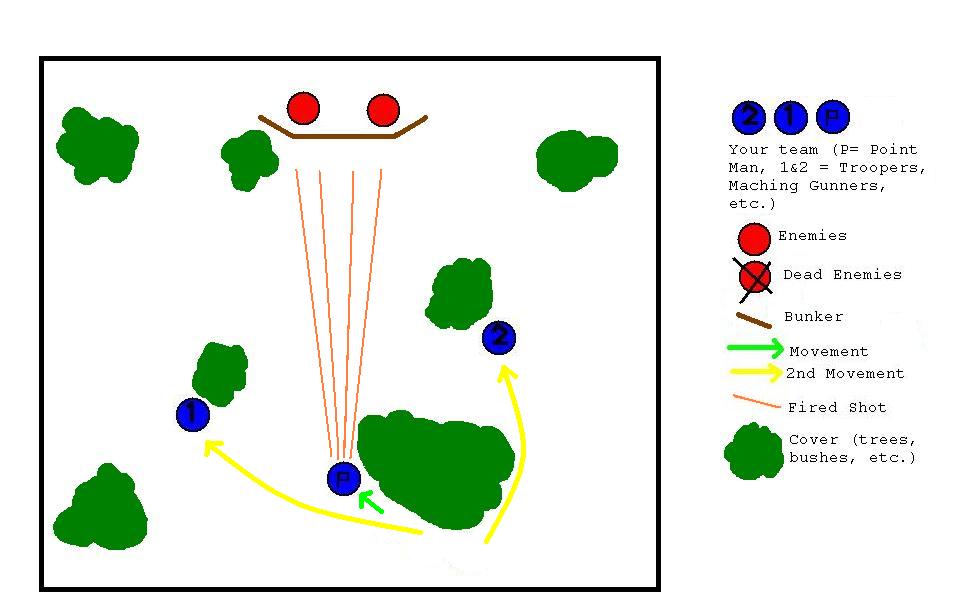
Whe your team is in position, your point man is the first to move.
However, he does not move far. He must move around the cover so that he is between being on the side of the cover andbehind
the cover. He should be within the enemy's field of view. When he moves, he should then stay in this position.
He can move behind the cover to avoid enemy fire, but he must stay out in this position as much as possible. He is the
diversion. Whenever he is in this location (which should be alsmost all of the time) he should be firing at the bunker.
His job is NOT to hit the enemy, however. His job is to fire shots that go just over the top of the bunker, of just
around the sides of it. He is laying down cover fire to keep the enemy from looking up and seeing Blue #1 and Blue #2,
as they now MOVE from behind the cover, in two opposite directions, to cover closer to the bukner, on either side
of it. They must move while the enemy is ducking to avoid fire from your point man, so that they are now seen.
Blue #'s 1 and 2 do not fire at all yet. See diagram below:
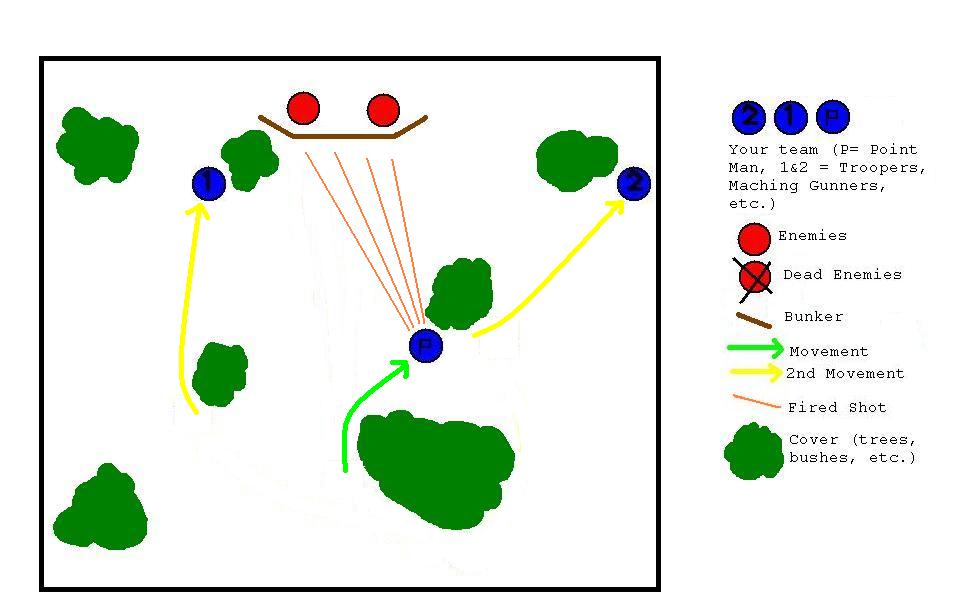
Now that Blue #1 and Blue #2 are both behind their second piece of
cover, and have not fired yet, it is the point man's turn to move again. While laying down cover fire so that the enemy
does not look up to shoot at him, the point man moves down the center towards the bukner to apiece of cover closer to them.
This will almost 100% always cause a total loss of reason within the other team, and they will completely stop looking around
for other enemies. They are locked in tunnel vision, and are only thinking about this one imminent threat, your point
man (who continues his covering fire) while the real threat, Blue #1 and Blue #2, move to their last piece of cover, one to
either side of the bunker, the closest p[ieces of cover to the bunker around. They still do not fire yet.
See diagram below for a visual explanation.
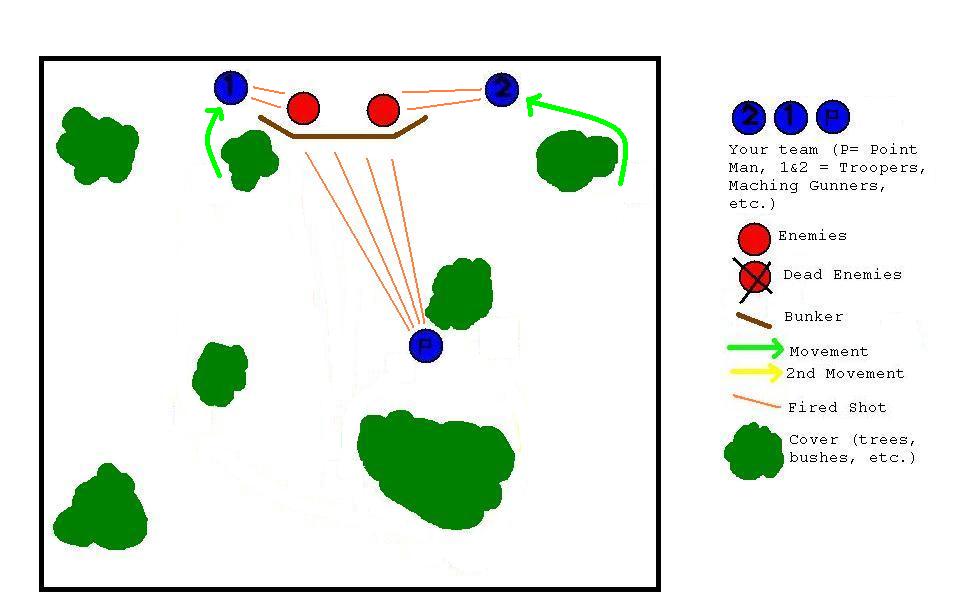
Your enemy is still behind their bunker, trading fire with your point
man, when he suddenly puts up a fvery strong, elongated barrage of fire. The enemy all ducks down to "wait out the storm"
for a second until the point man has to reload or repump, etc. This is the fun part. Blue #1 and Blue #2 come
flying around the backside of their cover, guns blazing, and take out all enemies behind the bunker. I find it is actually
very effective (not to mention cool-looking..) to dive to the side out from behind the cover and shoot at the enemies in midair.
This makes you a moving target, and puts you in position to land on your shoulder and, if you are decently agile, roll up
to a crouch, ready to slach someone wide open with your dagger, or blast any survivors apart. See below for final attack
sequence diagram.
If you perform this correctly, it should only take you about 30 seconds
to 1 minute to complete from the moment your point man comes ino the enemy's view and begins laying down cover fire.
If Blue #1 and Blue #2 have to wait for long periods of time (more than 10-20 seconds) for the enemy to duck down so that
they can move, your point man needs some higher rate-of-fire weaponry. A good idea fpor the point man would be to carry
any two of the following blasters: Mad Hornet; Blastfire; Hornet AS-6. This will give him an ample amount of firepower,
which he can use in such a way as one of the two blaster's full of ammo for cover fire for each of the firswt two movements
by his teammates, followed by the unloading of a powerclip to cover the final rush around the cover to blow the enemy
away. The final result of this scenario is depicted below. Practice the maneuvers of this tactic with your team
once or twice so they get the feel of how it works. If you do it enough, Blue #1 and Blue #2 should have a sort of sense
as to when they should move, and they will, without communicating, begin to move at the same time. Over time this becomes
uncanny, and very lethal.
|